Pages

Sunday, April 28, 2013

Use Music Controls Without Unlock Swipe

Everyone listens to music on their iPad, iPhone or iPod Touch, especially when exercising, working around the house, studying ,etc. Often we are listening to music while doing something else, multitasking.

But when the inevitable time comes to access the music controls, how annoying to have to stop what you're doing, swipe to unlock the device, and then finally increasing the volume, skipping the song, etc.

Fortunately, you don't have to go through all that - there is a way to access the music controls without unlocking your iOS device.

Anytime your device is in "lock mode", even with the screen blacked out, simply double tap the home button. The music controls will appear on the screen. Change the volume, skip that horrible song, go back to the good one – all without ever unlocking your iPhone, iPod Touch or iPad!


Here's an example.

A song was playing, the screen totally black. A simple double tap on the home button and the music controls appear! This works on all IOS devices. 

Music controls without an unlocking swipe - sweet!

Update: with iOS 7, Apple makes this easier: a single tap on the Home key will display the music controls.  For iOS 6 and earlier users, this double tap method remains the best way to access your music controls.

Sunday, April 21, 2013

Contacts: Quick Add From Emails


Contacts App
The Contacts app comes with the iPad, iPhone or iPod Touch devices, one of the native Apple apps. It's essentially an online address book, storing your friends/family names, e-mails and phone numbers.

It's especially handy on the iPad for sending e-mails. Instead of memorizing friends' e-mail addresses (impossible), you can type their name and the Mail app will pull their e-mail address from your Contacts list.


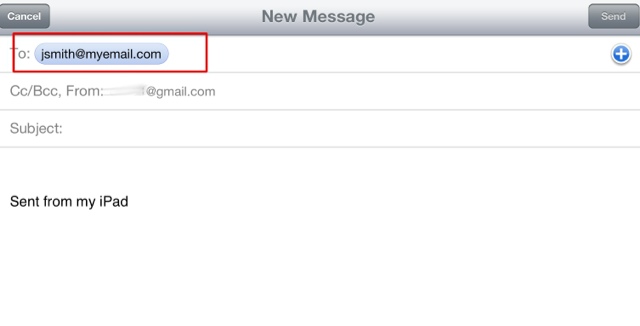
This is easier to show by example.  I want to send an e-mail to my friend, Zoe Smith. So I go into the Mail app, and start a new e-mail.


Oops, I don't remember her e-mail address. I start typing her name in the "To:" field but nothing happens. Zoe is not in my Contacts app - I need to add her.


Tap on the Contacts app icon (see image at the top of the post). Then tap on the Plus (+) sign to add a new contact.

This is the long, manual way to add a contact. After going through this, I'll show you a much quicker way to do it directly from an e-mail.


I add Zoe's information and then click the "Done" button. Zoe is now in my Contacts list.


Now, the e-mail to Zoe is much easier. I just type the first letter of her name and her entry pops up from the Contacts list.

All I have to do is tap her name from the pop-up and her e-mail information will be substituted in the e-mail for me.


Quick Add to Contacts List from Emails - Method #1
There's a quicker way to get e-mail addresses added to your contact list. You just need an e-mail from your friend or have them listed in the e-mail distribution list. Let's run through a couple examples.


I also want to add my friend John Smith to my Contacts. Fortunately, I have an e-mail he is listed in.


A quick tap on his name in the e-mail gives me this pop-up. I tap on "Create New Contact" and John is added to my Contacts!


Next time I start an e-mail to John, if I start typing his last name (or first name), his contact info is immediately available to choose from.


A quick tap on his info and his email is ready-to-go.

Quick Add to Contacts List from Emails - Method #2
Unfortunately, sometimes the quick method to add contacts from e-mails is slightly different, and this can be confusing. It seems to occur when you are pulling an e-mail address that looks like the below example. This was a forwarded e-mail, and John's address was farther down the note. Notice that the e-mail address is spelled out.


Like before, I tap once on John's email address.


But this time, up pops a new email with his address pre-populated in the "To:" field.  But I didnt want this, I wanted to add him to Contacts.


The solution: tap and hold (i.e. loooong tap) on the email address. Then, up pops this option to Add to Contacts.


It's also slightly more cumbersome, because this will add him to contacts, not under his name, but under his e-mail address. You can correct this in the Contacts app.

So, there are two quick methods:
  1. Tap once on the addressee
  2. If #1 fails, tap and hold (long tap) on the email address

Other Contact Options

If you already have a wealth of contacts in your PC with Microsoft Outlook, you can pick them up automatically by syncing to your PC from your iPad. If all your contacts are in a web e-mail account, such as Gmail or Yahoo Mail, you can sync your mail account contacts and your iOS contacts using the Settings app.


Monday, April 15, 2013

Notes App Folders: How to Create


The Notes app is great for dashing off quick notes and reminders. But, since Notes gives you no way to organize your notes into folders, it can soon be hard to find things. Dozens of uncategorized notes can leave your Notes app in a sorry state!

Fortunately, with a little bit of ingenuity, you can create Notes App folders. The iPad Notes app (and this applies to all iOS devices) lets you sync your notes with your e-mail account or iCloud. That synchronization extends to Notes folders. So, if you create a Notes subfolder in Gmail, it will be synchronized and appear in your iPad Notes app! (And, as a bonus, these Notes folders will also sync to your other iPhone or iPod Touch as well.)

I have successfully tested this with my Gmail e-mail account, and my Yahoo e-mail account. Other major web email services that support notes should work also, I suspect.  If you prefer to synchronize with iCloud, you can create folders with any of the iWork Apple apps (Pages, Numbers, etc.) and these will also show up in the Notes app.  I will demonstrate email syncing here.

To create Notes app folders:

  • Set up the Notes app to synchronize with an e-mail account that supports notes folders (e.g. Gmail, Yahoo, etc.)
  • Go to your e-mail account and set up extra notes folders
  • Verify the new folders appear in the iPad Notes app
  • Create new notes in the appropriate subfolders
  • Transfer existing notes into the appropriate folders as desired
Here are step-by-step screen shots on how to create Note App folders.

First, make sure your iPad \ iOS synchronization settings for the Notes app are correct. Here the Notes app does not sync with iCloud to enable Email syncing.


Instead, the Notes "Default Account" is the web e-mail service I want to sync with: Gmail.


Finally, your Mail settings for the Default Notes app Email Service must show Notes syncing ON


The key step: in your web e-mail Notes area, create a new folder . In Gmail, I go into Settings > Labels > Create New Label. (Strictly speaking, Gmail has labels, which are not really folders, but they will get translated into folders by the Notes app.)

I will create a Gmail "Tech" label...


...and I will nest it under the Notes label


The new Gmail "Tech" label created under the parent Notes label


Now, return to the Notes app. In the upper left, tap on the "Accounts" button


And you will now see, mirabile dictu, Notes has the new folder, "Tech"


Tap on "Tech" and then create a new note.  It will reside in the new Tech folder.


In Notes the only way to move individual notes between folders is to copy/paste them.  It's faster to move them in your email account, usually.  Here in Gmail, I can check multiple notes and move them to the new folder all at once.  Your Notes app will sync and move them as well.

You can create additional folders for Notes in your email account and they will sync into the Notes app.


If you have multiple e-mail accounts linked to your Mail app, you can pull in notes from each of them. At any given time, you can only sync the Note app to one e-mail account. The good news: if your Notes app changes from one e-mail account to the other, the former notes don't get deleted.

In the screen shot above, I formerly synchronized with my Yahoo e-mail; now I have changed to sync with Gmail. My Yahoo-created notes, remain intact.

See also: Notes App & the Case of the Vanishing Notes
Many Notes app users have reported all of their iOs notes suddenly disappear!  Learn what causes this and the solution.


Friday, April 12, 2013

Choose the Email Account a Reply is From


If you have set up multiple email accounts on your iPad (or iPhone or iPod Touch) you may have a need to trade-off between these accounts.  Luckily, the Mail App lets you change which email account you use for your replies and forwards.  Take an incoming email from your Gmail account and reply to it with your Yahoo account, etc.  This a simple, useful trick.


Settings App showing multiple email accounts


Here's how to swap email accounts on your replies


Like normal, select an email and choose to reply or forward.  Note the Mail App has the Cc/Bcc/From combined in one line.  Tap the Cc/Bcc/From once to split them into separate lines.


Tap once on the now–separated From line – it will pop up a list of your email accounts.  I will tap on my Yahoo account to choose it as the source of this reply.

My reply will now be sent from my Yahoo account, even though the incoming email was in my Gmail account.  If you keep copies of sent mail, you can find your reply in your Yahoo Email Sent folder.


Related posts: Set up Multiple Email Accounts on Your iPad, iPhone or iPod Touch


Sunday, April 7, 2013

Sync your PC and iPad Wirelessly


You can synchronize your Windows PC with your iPad, iPhone and iPod Touch - no cables required! If you have a Windows 7 or Windows 8 PC you can use iCloud to sync your photos, contacts, calendars and bookmarks amongst your devices. (Windows XP users can continue to use iTunes and USB cable to manually sync with your iOS mobile device.)

This sync process doesn't happen automatically. The key step is to install iCloud Control Panel on your PC. 

Follow these steps: 

  1. Download Apple's iCloud Control Panel to your PC
  2. Install iCloud Control Panel (Apple's step-by-step instructions to install)
  3. Set the iCloud Control Panel settings to customize your syncing
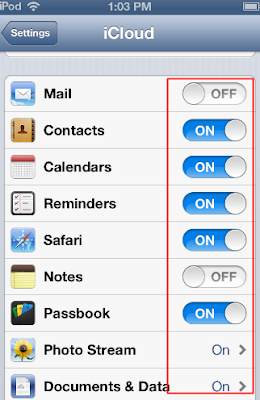
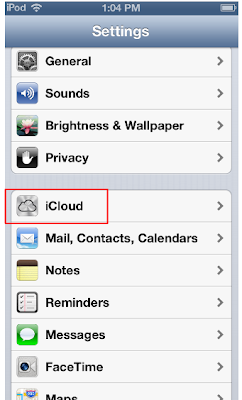
  4. Ensure iCloud syncing settings on your iPad, iPhone or iPod Touch are set to On
 iCloud  Control Panel window on your PC


Settings App iPhone / iPod Touch settings governing sharing (iPad similar, but all on one screen)

Note with the above settings I'll be sharing my contacts, calendars, reminders, Safari bookmarks, Passbook settings, Photos and documents with my PC.

Keeping my Apple mobile devices in sync with my PC gives me added flexibility and convenience.  For example, moving numerous photos from my iPod to the PC (for permanent storage) now happens automatically!

One caveat: iCloud only keeps your most recent 1000 photos in the Photo Stream. On your PC, make sure you copy the photos you want to keep to a more permanent location.